Pages

Showing posts with label tando creative. Show all posts

Monday, 31 December 2018

Bendy Spine Mini Book

Another day, another mini book created. This time I was inspired by some white metallic paint (it doesn't take much to inspire me at the moment). I painted the covers of this mini book, first with white and then with the metallic white and sat back to think about what next.

This is the finished book:

I wanted something elegant so I loaded up my script stamp with gold paint and stamped the covers and the spine


I had a napkin with a variety of black script on it so I tore it down to the last layer, tore the parts off that I wanted and adhered it to the covers with some matt finish modge podge (I love modge podge!)

I wanted some bolder black on the cover too so I stamped a variety of my postcard stamps with black Stayzon.

I then painted the edges of the book with a very fine paintbrush and some of the gold paint

For the pages, I used the Tando Creative innies pack and cut 8 strips using the larger template. I rounded the edges with a punch to give an even finish. I wasn't sure what I wanted in the book yet so I have left them blank.


I used some thick black cotton to wind along the spine and slip the pages in between, so they can be taken out easily for decorating at a later date. I used some double sided tape to adhere the ends of the cotton to the inside of the spine.

I love this elegant finish to this book and watch this space for what I do with the pages

Claire x


Sunday, 30 December 2018

Dotty the Whimsical Bird

Back to the Tando Creative and this time, Whimsical Birds. These come as a variety of grey board shapes that make bodies, heads, wings, arms, eyes and legs and the possibilities are endless. You can mix and match as you like. Here is my finished bird. I called her Dotty because she is covered in dots and spots

Orange isn't normally a colour that I would go for, but for some reason I was drawn into making an orange bird. I mixed red and yellow acrylic paints together and covered all the shapes, apart from the legs, in orange paint. I then toned it down a bit and made a yellow acrylic wash and painted over the orange. Then I covered some bubble wrap in yellow paint and stamped it all over the bird.

I hand painted orange spots on and then went around the edges of the bird with black dots made with a fineliner. I added the detail for the beak and also outlined the eyes with a thin line of black dots.

For a finishing touch I added glossy accents over the eyes and the legs. Here is a slightly better close up


For the background, I had some mini canvases that I hadn't thought of a use for before so I painted it over in a pale blue crackle paint. I then mixed some green acrylic paint with water and added a wash to the crackle paint, which really helped draw out the cracked effect.
I sealed this with glossy modge podge to stop the cracks from flaking off.


Then I decided I needed some clouds. I found an outline online, traced it onto tissue paper and then modge podged it on. However, the clouds went see through so I had to paint over them with white paint
I wasn't sure what to do at the bottom, but then I found a brick stencil and thought I would make him look like he was sat on a wall. I used texture paste, let it dry and the painted it over with brown acrylic paint

When the bricks dried they look really nice and stone like and full of texture.


I then stuck on Dotty the bird with some acrylic craft glue and she will hang pride of place on the wall in my craft room

Claire x

Saturday, 29 December 2018

Flower Mini Book

A few weeks ago, Tando Creative had these mini books on Hochanda and I knew the minute I saw them that I wanted them! They arrived just before Christmas and I've got so many ideas of how I want to decorate them.

First off though is this mini square book. It is about 2 inches square and has a separate spine that needs to be attached with masking tape, ribbon or material.


Covers -
Firstly I painted the covers with white acrylic to give it a good base. I then painted over this with a pearlescent blue acrylic paint. Then I ran it through the embossing folder, which I probably should have done first because some of the paint flaked off (I did just go over it again though)

Then I painted 2 chipboard flowers in the same shade of blue. I used my versamark pen around the edges and then heat embossed some blueberry powder onto it

For the ribbon, this was seam binding that I had from Stampin' Up. It's a cream colour but I used ink to colour it in pink to go with the theme of the book

I attached the spine on the outside with some pink ribbon I had. For extra security I used masking tape on the inside and painted over it.

The ribbon was attached both back and front with strong tape. Just remember not to pull it too tight around the book as it still needs to open!

Pages -
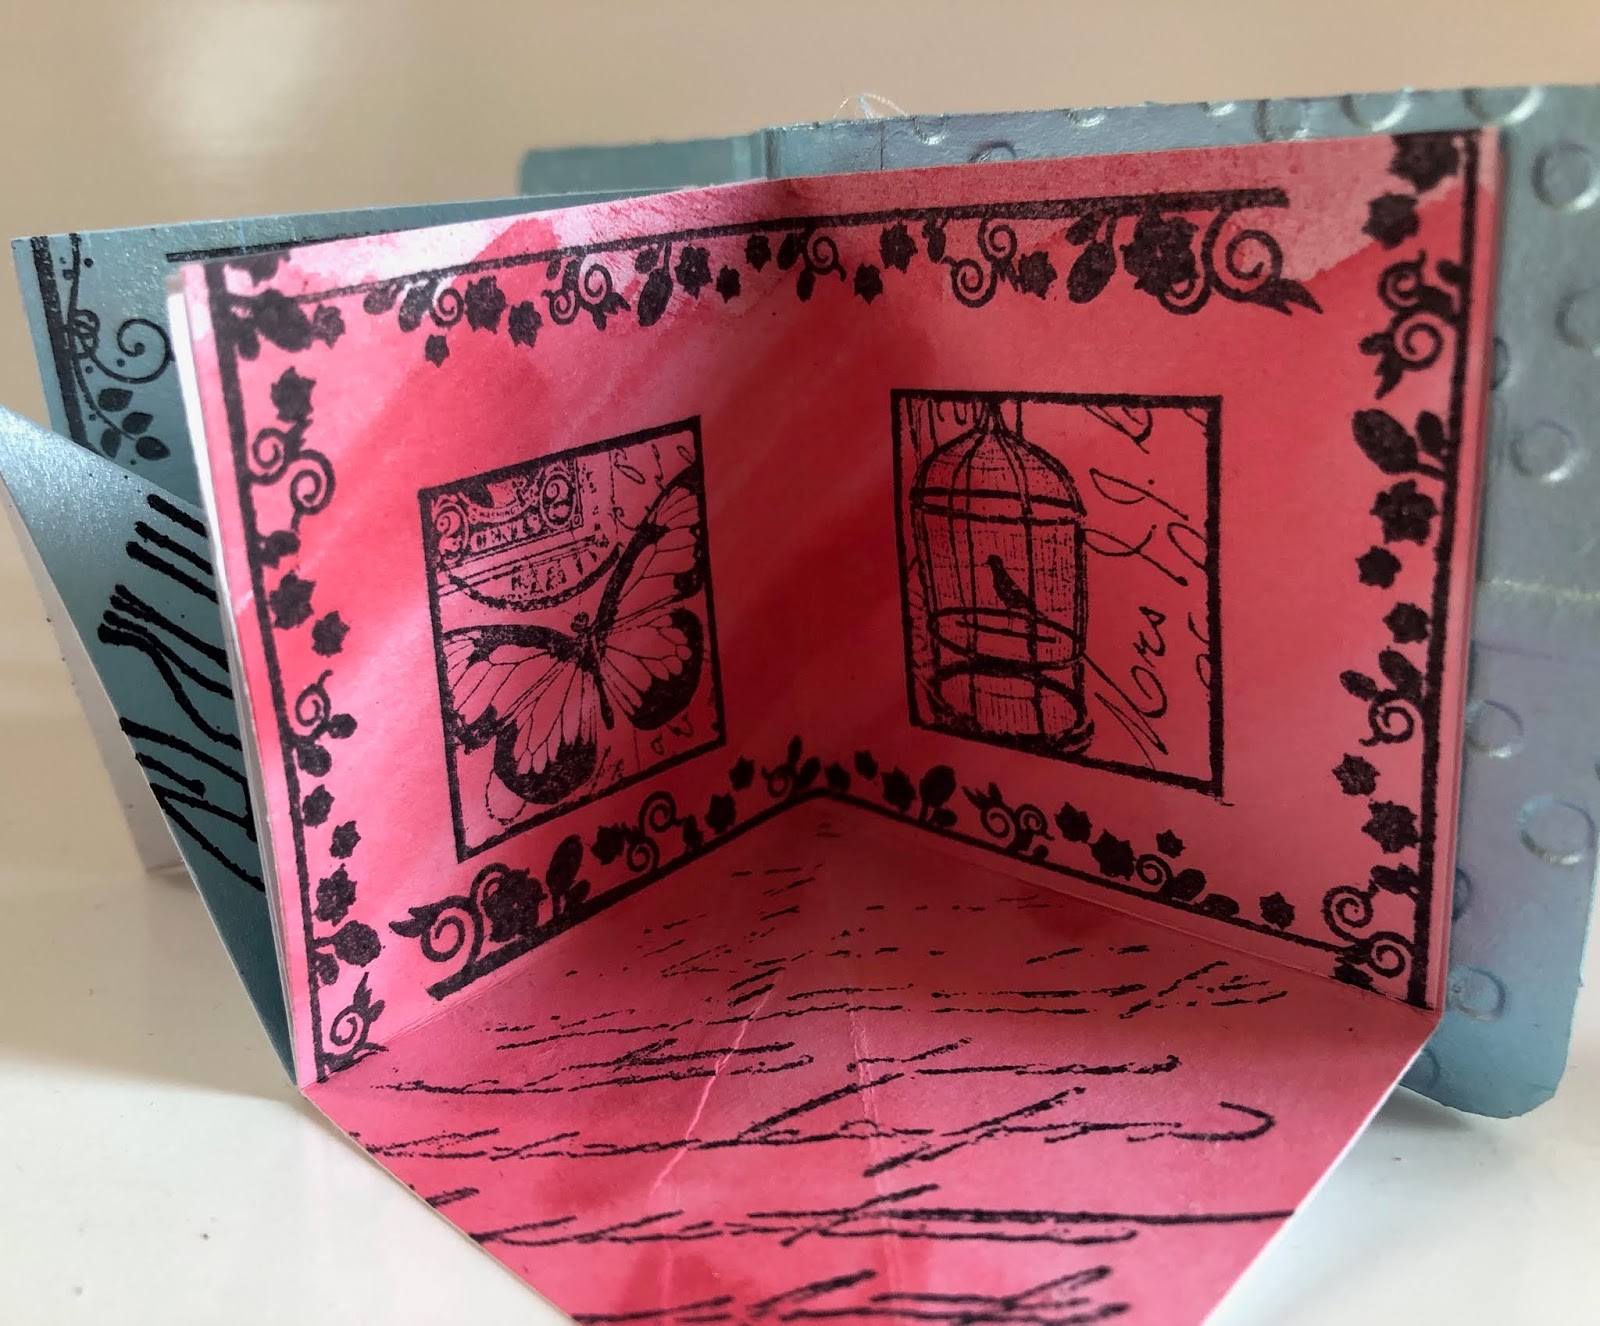
For the pages, I was inspired by a tutorial on the Hochanda show to make a pop out book that looks like the below:


I cut a square of paper that was 4" x 4" and then folded it in half then half again. I used a variety of inks and paints in the blue and pink shades to colour in the pages

I then used my Darkroom Door Garden Inchies stamps on the pages. They were the perfect size to add a stamped border around.

For the bottom page I used a mask and some Crafty Individuals stamps that I had forgotten about

The page below I used the same blue pearl paint mixed with water so it wasn't so thick. I then used WOW! powder in black glint, which gives it a very subtle shine to the images. The images are also much bolder than the ones stamped with regular ink.


Although it's not perfect, I loved making this book and I can't wait to make the other 10 that I have. There is also a little shelf for them all to sit on, which I will have to show you at a later date.

Claire x